


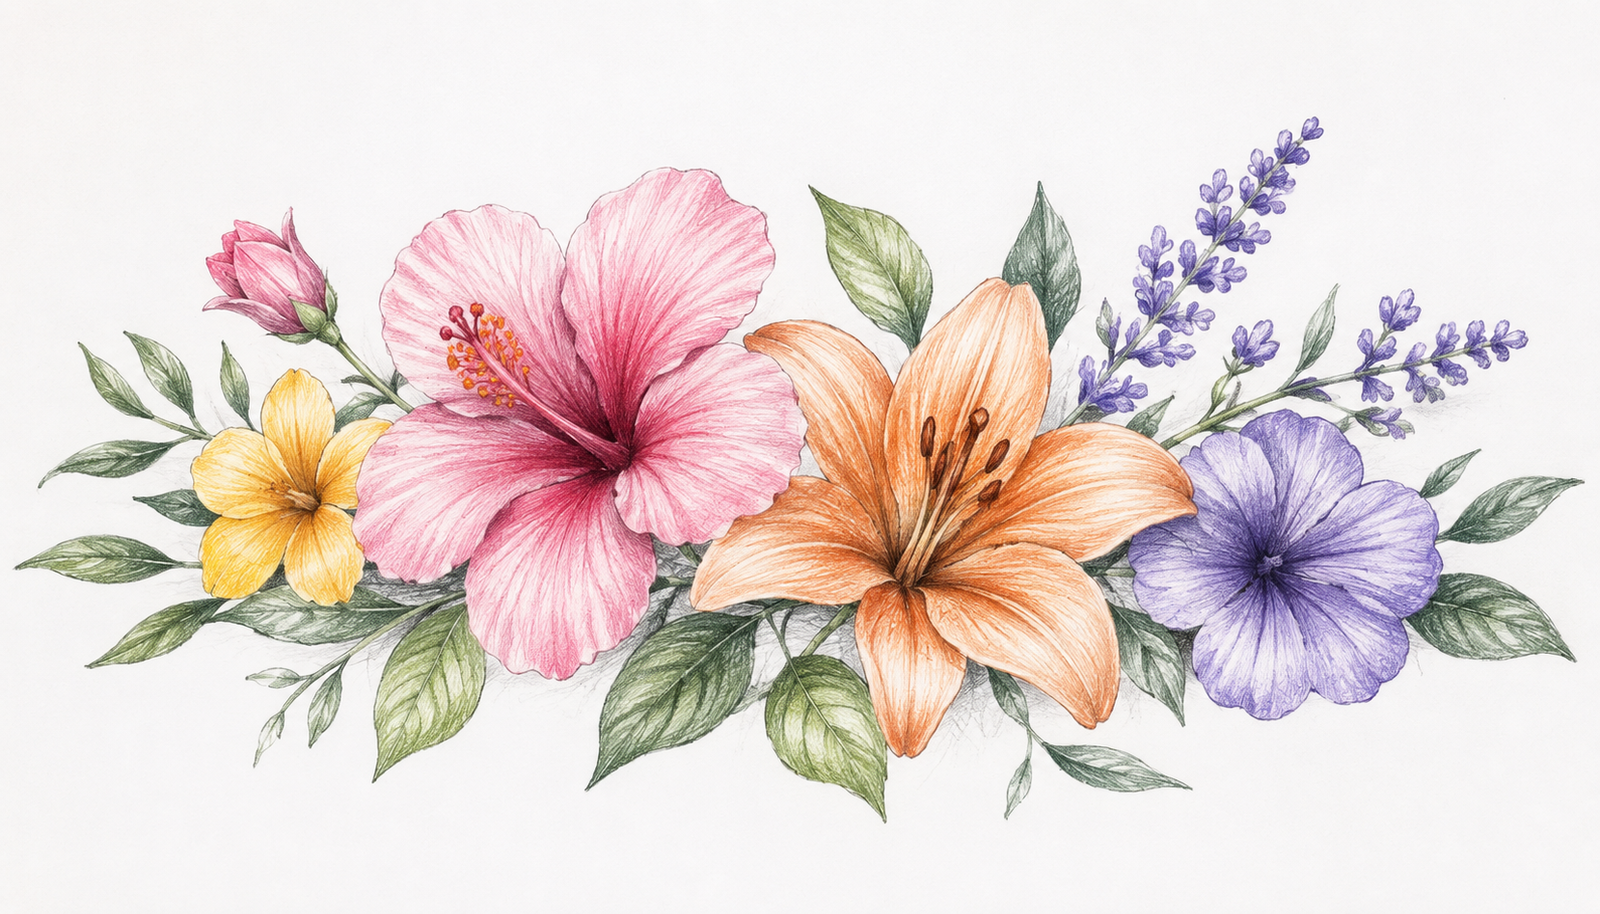
Flowers have inspired artists for centuries because they combine natural beauty with endless variety. Whether you want to sketch a simple daisy, create a realistic rose, or design decorative floral artwork, learning flower drawing is an excellent way to improve your artistic skills. The best part is that you don’t need to be a professional artist to get started. With the right techniques and regular practice, anyone can create attractive floral sketches.
This guide covers everything from understanding flower shapes to drawing realistic details, shading, and choosing the right materials. You’ll also discover practical tips, beginner-friendly tutorials, and expert advice that will help you develop confidence in your drawing abilities. Whether you’re looking for a Simple flower drawing blog, an Easy flower drawing blog, or inspiration for Flower drawing easy and beautiful designs, this guide has you covered.
What Is Flower Drawing?
Flower drawing is the art of illustrating flowers using pencils, pens, markers, or digital tools. Artists use flower drawings for sketching practice, botanical illustrations, greeting cards, journals, tattoos, coloring pages, and fine art.
Flowers are ideal subjects because they come in countless shapes, sizes, and colors. Learning to draw them improves observation skills, hand control, shading techniques, and an understanding of natural forms.
Why Flowers Are Perfect for Beginners
Flowers are one of the easiest subjects for beginner artists because they are built from simple shapes such as circles, ovals, and curved lines. Even complex flowers like roses can be broken into manageable steps.
Drawing flowers also teaches essential artistic principles, including:
- Symmetry
- Proportion
- Texture
- Light and shadow
- Composition
- Layering
As your confidence grows, you’ll naturally progress to more detailed botanical illustrations.
Different Styles of Flower Drawing
There is no single way to draw flowers. Each style offers a unique creative experience.
Some popular styles include:
- Simple line drawings
- Cartoon flowers
- Pencil sketches
- Botanical illustrations
- Realistic floral art
- Ink drawings
- Colored pencil artwork
- Watercolor flower sketches
- Digital flower illustrations
Trying different styles helps you discover which technique best matches your artistic goals.
Essential Drawing Supplies
Having the right tools makes learning easier, although you don’t need expensive equipment to create beautiful flower drawings.
Basic Supplies for Beginners
Start with these essentials:
- HB pencil
- 2B pencil
- 4B pencil
- Soft eraser
- Sketchbook
- Sharpener
- Fine liner pen
- Ruler
These affordable tools are more than enough for learning basic flower drawing techniques.
Optional Supplies for Advanced Artists
As your skills improve, consider adding:
- Colored pencils
- Watercolor paints
- Alcohol markers
- Blending stump
- Brush pens
- Drawing tablet
- Mixed media paper
These tools allow you to experiment with different artistic styles and finishes.
Drawing Supply Comparison
| Supply | Best For | Beginner Friendly | Recommended |
| HB Pencil | Sketching | Yes | ★★★★★ |
| 2B Pencil | Shading | Yes | ★★★★★ |
| Fine Liner | Outlines | Yes | ★★★★☆ |
| Colored Pencils | Coloring | Yes | ★★★★★ |
| Watercolors | Artistic Effects | Moderate | ★★★★☆ |
| Digital Tablet | Digital Art | Intermediate | ★★★★☆ |
Understanding Flower Anatomy
One of the biggest differences between beginner and experienced artists is understanding flower structure.
Instead of randomly drawing petals, skilled artists first study how flowers grow.
The basic parts include:
Petals
Petals attract pollinators and give every flower its distinctive appearance. They vary greatly in size, thickness, and arrangement.
Stem
The stem supports the flower and connects it to the leaves. It usually follows a gentle curve rather than being perfectly straight.
Leaves
Leaves balance your drawing and make flowers appear more realistic. Pay attention to their veins, edges, and direction.
Center
The flower’s center often contains the pistil and stamens. Adding these small details instantly improves realism.
Understanding these parts makes it much easier to draw flowers from imagination instead of copying images.
Basic Shapes Every Flower Starts With
Almost every flower can be simplified into a few basic geometric shapes before details are added.
Common construction shapes include:
- Circle
- Oval
- Spiral
- Triangle
- Curved lines
- Cylinders
Professional artists rarely start by drawing petals first. Instead, they create a light framework that keeps proportions accurate.
For example:
A sunflower begins with two circles.
A tulip begins with an oval.
A rose begins with a spiral.
A lily begins with a star-like guide.
Using construction lines reduces mistakes and creates cleaner sketches.
How to Draw a Flower Step by Step
Following a structured process helps beginners achieve better results.
Step 1: Choose a Reference
Real flowers are the best references because they reveal natural lighting, texture, and petal arrangement. If fresh flowers aren’t available, use high-quality photographs.
Observe the flower before drawing. Notice how petals overlap and where shadows naturally appear.
Step 2: Sketch the Basic Shapes
Use light pencil strokes to outline the flower’s overall form.
Don’t worry about details at this stage.
Focus only on:
- Size
- Position
- Proportion
- Direction
These guidelines can easily be erased later.
Step 3: Add the Petals
Begin placing petals around the center using soft curved lines.
Avoid making every petal identical.
Nature is full of subtle variations, and these differences make drawings look more realistic.
Step 4: Draw the Stem and Leaves
Add a gently curved stem instead of a perfectly straight line.
Sketch leaves using simple ovals before refining their edges and adding veins.
Leaves should naturally support the flower instead of distracting from it.
Step 5: Refine the Details
Erase unnecessary construction lines.
Improve the edges of each petal.
Add small folds, curves, and natural imperfections.
These details give your flower personality and realism.
Step 6: Add Shading
Determine where the light is coming from.
Darken areas underneath overlapping petals.
Keep highlights bright by leaving some paper untouched.
Build shadows gradually instead of pressing hard with your pencil.
Soft layering creates smooth transitions that make flowers appear three-dimensional.
Step 7: Finish Your Drawing
Complete the illustration by strengthening important outlines while keeping secondary lines softer.
Review your drawing carefully and make small adjustments to balance the composition.
With consistent practice, even simple flowers can become impressive works of art.
Easy Flower Drawing Tutorials
If you’re wondering which flowers to practice first, begin with simple varieties before moving on to more detailed blooms.
Daisy
A daisy is one of the easiest flowers to draw because it consists of a circular center surrounded by evenly spaced petals.
Skills learned:
- Petal spacing
- Symmetry
- Basic shading
Difficulty: Easy
Estimated Time: 10 minutes
Tulip
Tulips use smooth curved shapes that are perfect for beginners learning clean outlines.
You’ll practice:
- Soft curves
- Leaf construction
- Balanced proportions
Difficulty: Easy
Estimated Time: 15 minutes
Sunflower
Sunflowers introduce artists to layered petals and textured centers.
This flower improves:
- Repetition
- Texture
- Depth
- Composition
Difficulty: Medium
Estimated Time: 20 minutes
Rose
The rose is one of the most popular flowers among artists because of its elegant layered petals. Although it may look difficult at first, breaking it into simple shapes makes the process much easier. Start with a small spiral in the center, then gradually build outward by adding overlapping petals.
Focus on keeping the petals loose rather than perfectly symmetrical. Real roses have natural variations that make them beautiful.
Skills you’ll practice:
- Layered petals
- Curved line control
- Depth and perspective
- Shadow placement
Difficulty: Medium to Hard
Estimated Time: 30–40 minutes
If you’re looking for a Rose flower drawing blog, practicing roses regularly is one of the fastest ways to improve your floral illustration skills.
Lily
Lilies have large, elegant petals that curve outward. Begin by sketching a star-shaped guideline before adding each petal. Don’t forget the long stamens extending from the center, as they are one of the flower’s defining features.
Skills you’ll practice:
- Large petal construction
- Natural curves
- Flower anatomy
- Delicate detailing
Difficulty: Medium
Estimated Time: 20–25 minutes
Lotus
The lotus flower is known for its balanced, symmetrical appearance. Draw the center petals first, then add larger outer petals around them. The layered arrangement creates a graceful and peaceful design.
Skills you’ll practice:
- Symmetry
- Layering
- Balanced composition
Difficulty: Medium
Estimated Time: 20 minutes
Cherry Blossom
Cherry blossoms feature small petals and delicate branches. Instead of drawing one flower, create small clusters to achieve a more natural appearance.
Skills you’ll practice:
- Tiny details
- Composition
- Branch structure
Difficulty: Medium
Estimated Time: 15–20 minutes
Lavender
Lavender consists of many tiny flowers arranged along a thin stem. Although each blossom is small, together they create beautiful texture and movement.
Skills you’ll practice:
- Repetition
- Texture
- Natural flow
Difficulty: Easy
Estimated Time: 15 minutes
Flower Difficulty Comparison
| Flower | Difficulty | Time | Best for Beginners | Main Skill Learned |
| Daisy | Easy | 10 min | ✔ Yes | Petal spacing |
| Tulip | Easy | 15 min | ✔ Yes | Curved lines |
| Lavender | Easy | 15 min | ✔ Yes | Texture |
| Sunflower | Medium | 20 min | ✔ Yes | Layering |
| Lily | Medium | 25 min | ✔ Yes | Flower anatomy |
| Lotus | Medium | 20 min | ✔ Yes | Symmetry |
| Rose | Hard | 30–40 min | No | Realistic petals |
Pencil Shading Techniques for Realistic Flower Drawings
Shading transforms a flat sketch into a realistic piece of artwork. Instead of using heavy lines, gradually build darker values with light pencil strokes.
Useful shading techniques include:
Layering
Apply multiple light layers instead of pressing hard with your pencil. This creates smoother transitions.
Blending
Use a blending stump or tissue to soften pencil marks and create realistic gradients.
Cross-Hatching
Draw intersecting lines to add darker shadows and texture.
Highlight Preservation
Leave the brightest areas untouched to represent light naturally hitting the petals.
If your goal is Realistic flower drawing easy, mastering these simple shading methods will dramatically improve your artwork.
Adding Color to Flower Drawings
Color brings flowers to life. Start with light tones and gradually build richer shades.
Popular coloring methods include:
- Colored pencils for smooth blending
- Watercolors for soft, delicate effects
- Alcohol markers for vibrant colors
- Digital brushes for flexible editing
Study real flowers whenever possible to understand natural color variations instead of relying on memory.
Common Flower Drawing Mistakes
Every beginner makes mistakes, but recognizing them early helps you improve faster.
| Mistake | Why It Happens | Solution |
| Identical petals | Drawing from memory | Observe real flowers |
| Heavy outlines | Pressing too hard | Use light sketch lines |
| Flat appearance | Lack of shading | Add highlights and shadows |
| Incorrect proportions | Skipping guidelines | Start with basic shapes |
| Overworked details | Rushing the process | Build details gradually |
| Ignoring anatomy | Not studying flowers | Learn flower structure |
Remember that mistakes are part of learning. Every sketch teaches something valuable.
Beautiful Flower Drawing Ideas to Practice
If you’re running out of inspiration, try drawing different floral subjects to challenge yourself.
Ideas include:
- Wildflowers
- Floral bouquets
- Botanical illustrations
- Garden scenes
- Flower wreaths
- Vintage botanical prints
- Floral borders
- Journal doodles
- Greeting card flowers
- Seasonal blossoms
These projects are perfect if you’re searching for a Beautiful flower drawing blog full of creative inspiration.
Traditional vs Digital Flower Drawing
Both traditional and digital art have their own advantages.
| Traditional Drawing | Digital Drawing |
| Uses paper and pencils | Uses tablets and software |
| Natural paper texture | Unlimited undo options |
| No batteries required | Easy color adjustments |
| Affordable to start | More editing flexibility |
| Great for sketching | Excellent for professional illustration |
Choose the medium that fits your goals. Many artists enjoy practicing with both.
Practice Exercises to Improve Faster
Consistent practice is the secret to becoming a better artist.
Try these exercises:
- Draw one flower every day.
- Practice five-minute gesture sketches.
- Copy flower shapes using only simple lines.
- Study different leaf patterns.
- Sketch flowers from different angles.
- Create value studies using only pencil shading.
- Fill an entire sketchbook page with petals.
These exercises improve observation, confidence, and hand coordination.
Expert Tips for Better Flower Drawings
Professional artists often follow a few simple habits that consistently improve their work.
- Draw from real flowers whenever possible.
- Keep your pencil strokes light during the sketching stage.
- Study flower anatomy before adding details.
- Practice regularly instead of drawing for long sessions only occasionally.
- Focus on overall shapes before tiny details.
- Be patient—every drawing is a learning opportunity.
- Keep a dedicated sketchbook to track your progress.
Whether you’re creating a Simple flower drawing blog, an Easy flower drawing blog, or artwork that is Flower drawing easy and beautiful, steady practice will always produce better results than rushing.
Conclusion
Flower drawing is one of the most enjoyable and rewarding ways to build artistic confidence. By starting with simple shapes, understanding flower anatomy, practicing different flower varieties, and applying effective shading techniques, you can steadily create artwork that looks increasingly realistic and expressive.
Don’t worry about achieving perfection in your first few sketches. Every drawing teaches you something new, and improvement comes through patience and repetition. Whether your goal is to create quick doodles, detailed botanical illustrations, or realistic floral artwork, consistent practice is the key to success. Pick up your sketchbook, choose your favorite flower, and start drawing today.
Frequently Asked Questions
What is the easiest flower to draw?
A daisy is generally considered the easiest flower because it consists of a simple circular center with evenly spaced petals.
How can beginners draw realistic flowers?
Start with basic shapes, study real flower references, understand flower anatomy, and use gradual shading instead of heavy outlines.
Which pencil is best for flower drawing?
An HB pencil is excellent for sketching, while 2B and 4B pencils are ideal for adding smooth shading and darker details.
Should I draw from real flowers or photographs?
Real flowers provide the best understanding of texture, lighting, and form. However, high-quality reference photos are also helpful for practice.
How long does it take to improve at flower drawing?
With consistent practice for 15–30 minutes a day, many beginners notice significant improvement within a few weeks.
Can I learn flower drawing without taking art classes?
Yes. Many artists develop their skills through regular practice, observation, tutorials, and studying real flowers.
You May Also Read: uranium glass